


Easy Homemade Candles Using a Crockpot

October 19, 2026

Last year I did my community duty and shopped local for Christmas gifts. With a new baby coming and still trying to keep up with homeschooling and life, I just didn’t have the energy or brain power to create many gifts. Earlier in the year, I had rosy visions of crafting and creating homemade gifts, but the closer we got to Christmas the more allusive those ideas seemed.
While I love supporting local businesses, it hit my wallet a little hard for the number of gifts I needed to purchase. Plus, I am really trying to stretch myself and learn to make gifts. This is not only frugal and gentle on our family finances, but making homemade gifts teaches my children several things: gifts can be made with love, we don’t have to shop at the big box stores to celebrate, and we can learn to use our hands to give to others.

So one of the first gifts that we started making this year were candles. (To all my lovely friends who are going to receive these gifts this Christmas season, I apologize. I hope this doesn’t burst the surprise factor!).
After making several small batches of candles, each using a different method, I arrived at a method that works for me. It is not perfect, and it may or may not be the best fit for you. But hopefully you can get some ideas from this post!

First, I tried the trendy method of “cooking” the candles in the crockpot. The process was so merry! We simply filled the jars with wax and then set them down into the crockpot, filled the pot with boiling water, covered it with the lid, and a few hours later had melted candles.
While this process was simple, it had a few problems. First, because the lid was on the crockpot, condensation got down in between the jar and the wax. Not cool. Also, that particular blog, said to put the wax wicks into the jars after the wax was melted. I found this process finicky and difficult to keep the wicks in place.

Next, I tried the good old fashioned stove top method. This method is the most straightforward. Simply put your wax into the pot and gently heat on the stove. My only problem was my silly thrift store pot. It has a weird lip that spilled wax everywhere. Not the mess I was looking for.
So the method I am presenting to you today is an easy method for making homemade candles (certainly not the only in the world. Am I the only who gets a little annoyed with bloggers saying this is the only way or the best way to do such and such? Who gets such superlative authority?) Anyways…I digress. Back to candles.
I went back to the crockpot method and tailored it a bit. I simply left the lid off during the cooking process, and it worked beautifully!
A word about wax types before we jump into how to make the candles…
Beeswax is a very hard wax that sometimes burns oddly. The wick can burn straight down leaving large amounts of wax on the side of the candle.
Soy wax is very soft and cheaper than beeswax. Soy also tends to burn more evenly. So I decided to combine the soy wax and beeswax to cut cost a little and also create candles that (hopefully) burn evenly. In my humble opinion, there is nothing magical about specific ratios of beeswax to soy wax. I used about half and half (didn’t bother measuring), and the candles turned out just fine.


Gather Your Ingredients
Containers or jars to hold candles. (I used these candle jars from amazon, but the sky is the limit. If I was in a different season of life, I would love to scour thrift stores for unique jars, teacups, mugs, etc. to use as candle jars.)
Essential oils (optional).
Hot glue gun and glue sticks
Hot water pot (like a tea kettle)
Crockpot
Directions for Making Homemade Candles in the Crockpot
1. Fill a hot water pot with water and turn it on. The water will be heating while you go to step 2.
2. Glue wicks to the bottom of candle jars. Center the wicks in the center of the jar. The wicks sometimes release during the heating process, but I still like to attempt keeping the wicks in place during the “cooking” phase.
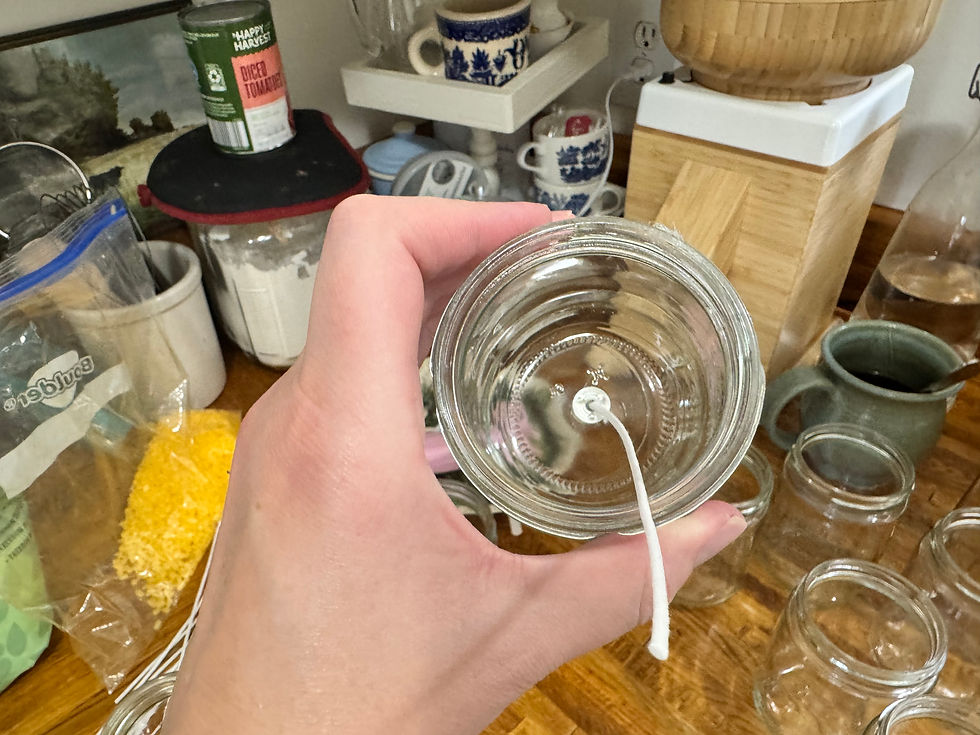
3. Fill the candle jars with your choice of wax pellets and set the jars into an empty crockpot.
4. By now, the water should be boiling. CAREFULLY pour the water around the candles, making sure that you don’t pour water into the candle jars.

5. Leave the lid OFF of the crockpot (here’s where my method is a bit different than others). This keeps your candles from getting water inside. Turn the crockpot on to high.
6. The wax should melt in about 1.5-2 hours. During the process, keep refilling the candle jars with wax to the level that you want them. Obviously, the wax will melt and go down, so you need to keep replenishing the wax.
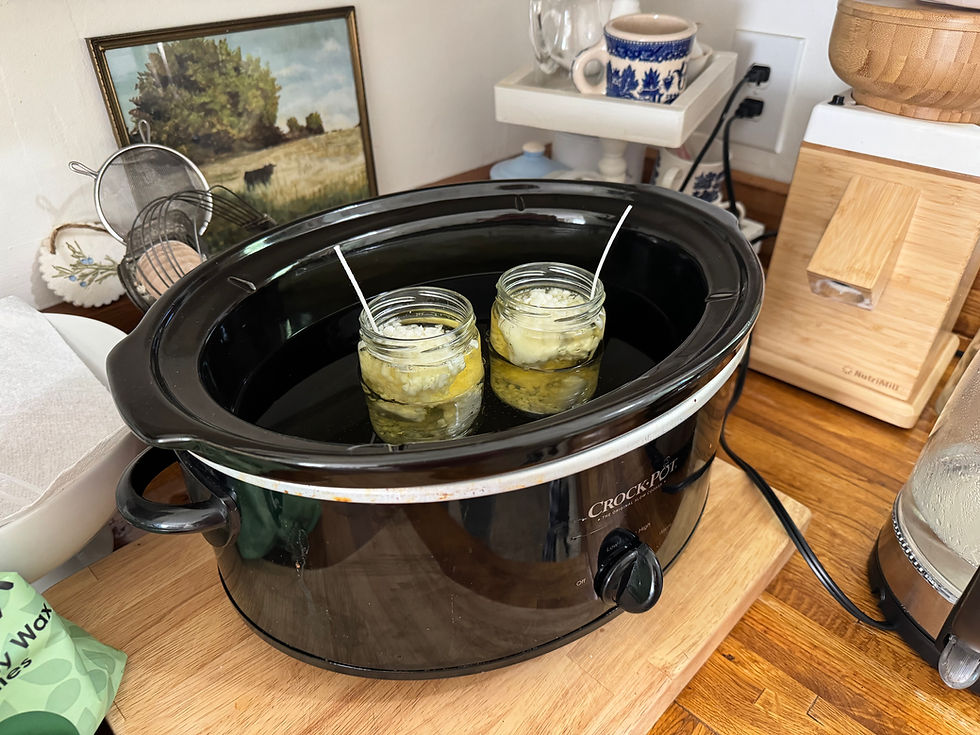
7. Once the wax is melted, turn off the crockpot. Carefully lift the candles out using oven mitts or even a canning tool (you know…the thingamajig you grab the hot jam jars with?). Set them on a towel to harden. If the wicks come loose, no need to panic. Give the wax a few minutes to harden, and then reposition the candle wicks as centered and straight as possible. I found that giving the wax a few minutes to harden gave the wicks more support instead of swimming in the wax.

8. Give the wax about 10 minutes to cool before you add any essentials oils. Add as much essential oil as desired. I don’t like highly scented candles because they give me headaches. So I only added about 15-20 drops of essential oils per candle. Using something that you don’t mind throwing away (like a plastic spoon or clean stick) and gently stir the wax to distribute the oil.
9. Let your candles harden for several hours. Now you have beautiful, handmade, healthier-for-you candles perfect for gift-giving or simply enjoying in your own home!

Happy candle-making!
-Ashley
#healthier #health #fragrance #allergies #allergens #healthycandles #healthycandle #scent #scentfree #candles #candle #homemade #craft #wax #pellets #waxpellets #soy #beeswax #christmas #fall #winter #gifts #gifts #present #make #create #frugal #inexpensive #jar #crockpot #ashleyqurollo #howto #kids #children #friends #friendship #essentialoils


I love this idea, Ashley! Thanks for bringing us along 💖